
“You need a fuel called a website to make your firm ignite in the market.”
Google Sites is a website-building tool for businesses to communicate with their clients; it is one of the services offered by Google Suite. Utilizing Google Sites features, one can design specialized information-based websites. In addition, the platform can be connected to other G Suites services like Gmail, Google Sheets, Google Forms, and Google Maps. We shall carry out a few simple procedures to construct a website in this article. Let’s get rolling.
Here are five simple steps:
- Log in to your Google account
- Choose the sort of site you want
- Pick a theme
- Include a logo, a title, some pictures, and some text
- Publish it
Let’s go over all of these steps one by one and construct a website.
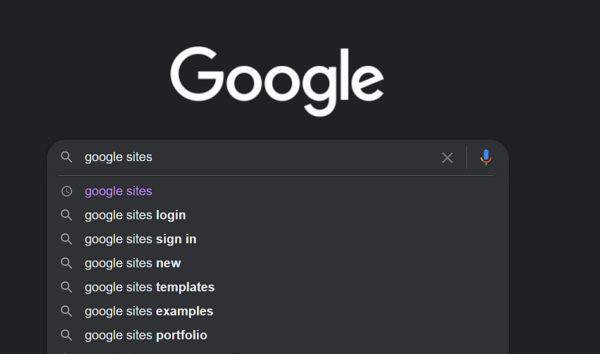
1. Log in to your Google account
You can access its homepage by typing Google Slides into a search engine and pressing Enter to go to the next page. Results will appear, and you may select the link in Screen 2 to go to the page.
 Screen 1
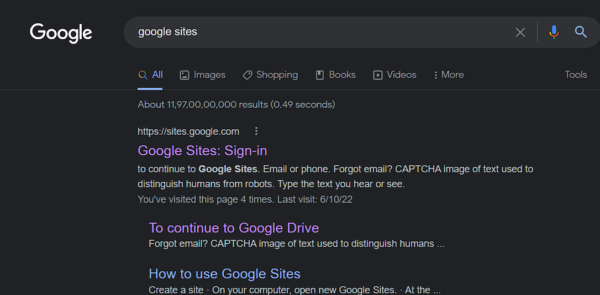 Screen 2
Enter “Google Sites” into your search engine’s search box, hit enter, go to the search results page, click the result link that says “https://sites.google.com,” and then go to the official site. Look at screens 1 and 2.
You must sign into the official website using your Google account credentials; to do this, click the log-in icon in the top right corner and enter your email address and password. See below, screen 3.
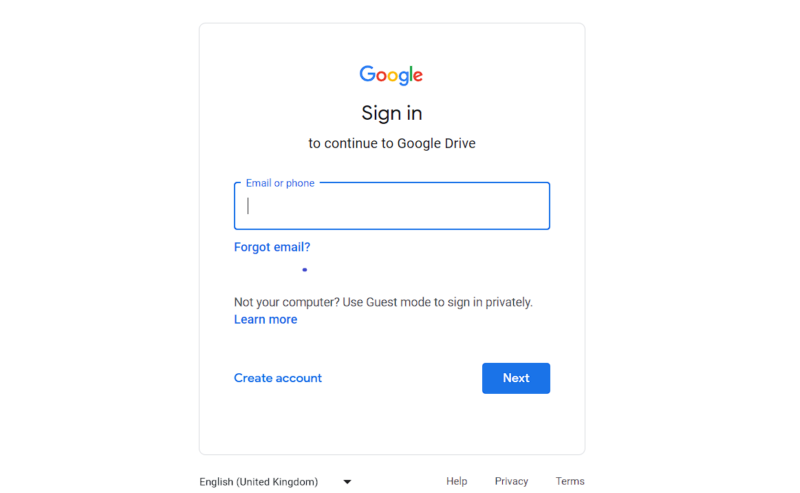 Screen 3
2. Choose the sort of site you want
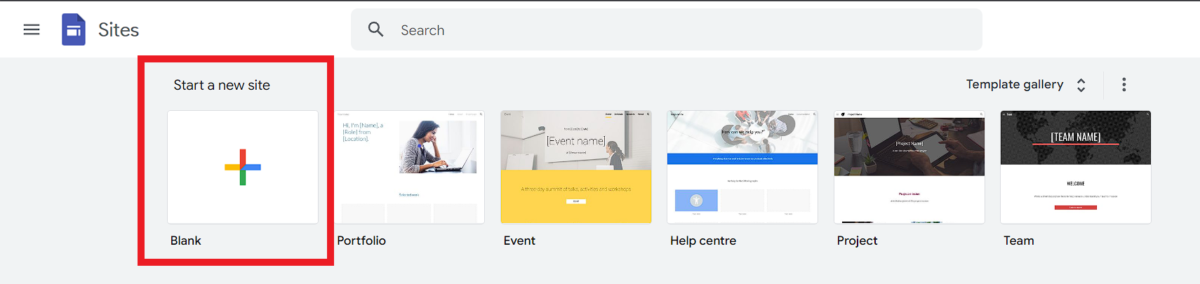 Screen 4: Themes
We can use a blank site as a template and construct our template by using themes and layouts; alternatively, you can select readymade templates from the other options shown on screen 4.
3. Pick a theme
 Screen 5
See screen 5 above, then click Themes in the top right corner to choose a theme for your website; in this case, we choose the (vision) theme. Your page name is currently untitled, therefore you must give it one. As an example, we’ll use JS Tigers as the page name. For it, follow the arrow in the left corner.
4. Include a logo, a title, some pictures, and some text.
The construction of this section is the most crucial since it keeps visitors on your website for a long time and contains all of your essential details, including personal details and a description of your business.
Let’s look at several features one by one to add:
A Logo
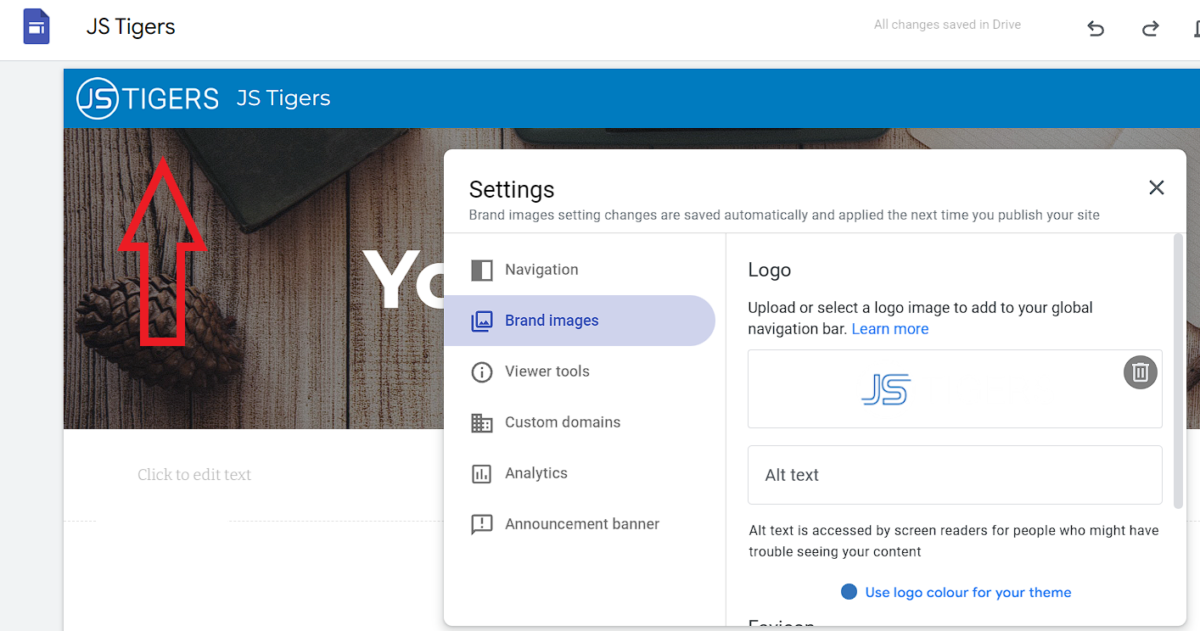 Screen 6
Your company’s logo lends legitimacy to your website; it should be easy to remember by customers so they can identify your business. To add a logo, select the option to “add a logo” in the top left corner of the screen and upload an image of your logo as shown on screen 6. This will upload and give your page a professional appearance.
Title
 Screen 7
The title of the website serves as a short, two- three word summary of your company’s identity. Screen 7 above uses an example title as (web development solution). You can create your title based on your industry.
Include a synopsis of your business
 Screen 8
You can add a concise description of your company’s work here by following the arrow, selecting the insert option, and then selecting the layout to add a box for adding an image and a short business description. view screen 8
Add your skills and experiences
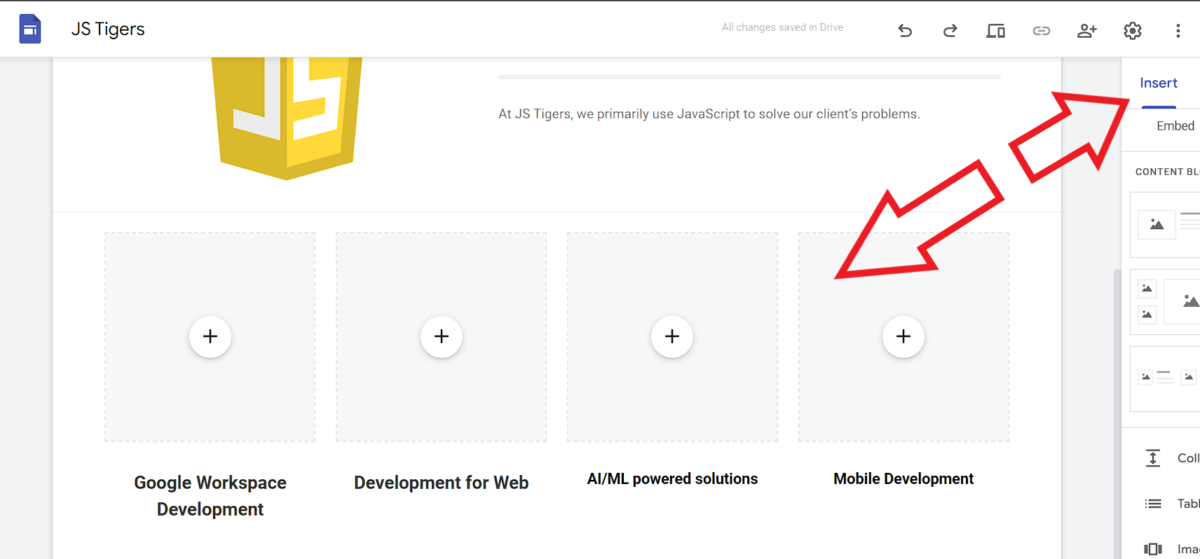 Screen 9
Using the insert tab once more, you can create a layout that contains details about the products, experience, and previous work of your organization. To leave a favorable impression, provide photos as well. Add graphics and submit them as seen on screens 9 and 10.
 Screen 10
Contact details
 Screen 11
To include contact information for customers to utilize to reach you for services, such as a phone number or email address, you can modify the footer option at the bottom. Screen 11
5. Publish it
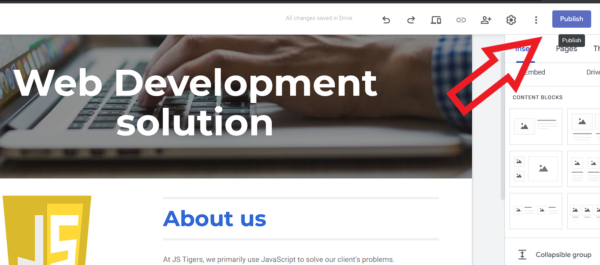 Screen 12
The moment has come to publish your website. To do this, select the choice as indicated on screen 12 and then click the publish tab by moving the mouse in the direction of the arrow.
On-screen 13, you can then launch your website by entering your web address and registering a free domain. You also have the option to choose a custom domain, which is a costly option.
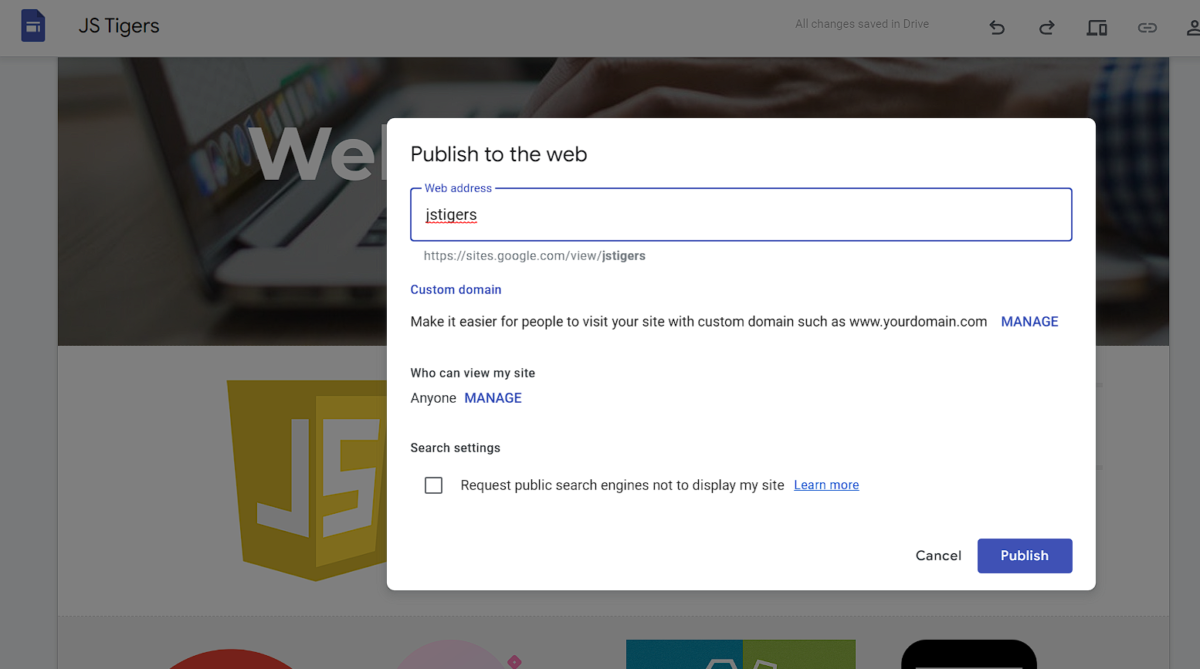 Screen 13
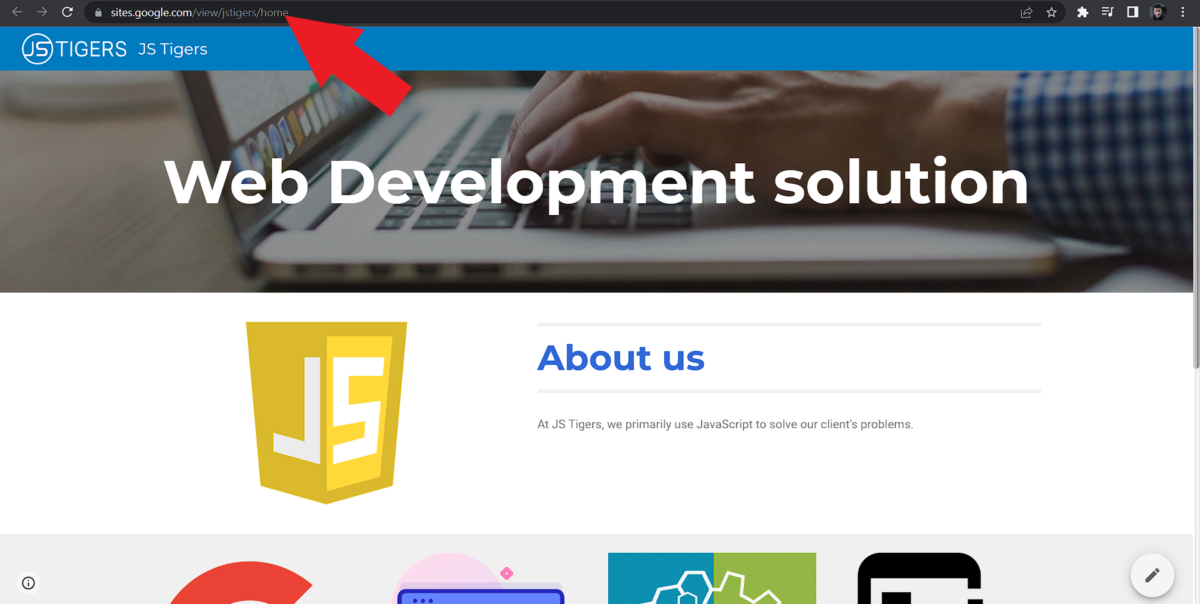 Screen 14
So, finally, following publication, you may see your website, add it to your various social media platforms, and promote your business. You can view the sample website we built by clicking the link provided,
https://sites.google.com/view/jstigers/home
On a final note, Google Sites is a great tool to employ for any entrepreneur trying to grow an audience for their brand.
Tags:
- #Google Sites